

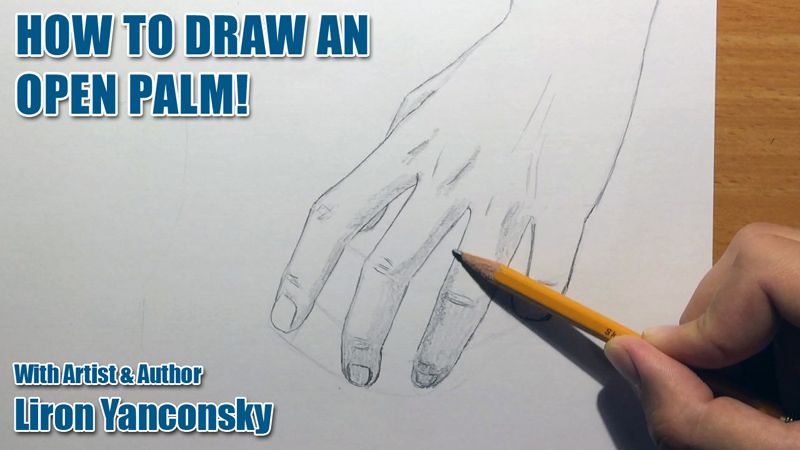
How To Draw An Open Palm
Hey friends!
Today nosotros have another fun anatomical drawing lesson.
In this drawing lesson, we're going to larn how to depict an open up paw!
Drawing the human hand is an crawly challenge, that calls upon your ability to actually KNOW some anatomy, and UNDERSTAND how the human being trunk works.
Bank check out the video, and I'll share some of the key points afterward.
I hope you enjoyed the video.
If you need some reference for drawing hands, check out these two images on drawing easily in different poses, and holding objects.
Central tips on how to draw an open mitt:
1. Pay special attention to the fanning of the fingers.
Remember, the fingers aren't straight, parallel lines that stick out of the hand.
The are fanning out of information technology. I show this really well in the video.
A good method of getting this right, is by cartoon those circular guidelines. Draw ane for each knuckle in the mitt.
ii. The overall shape of the hand.
Notice how the wrist is sparse, and expands as presently as information technology "turns" into the hand itself.
Utilise curved lines to represent the sides of the hand, which have more fatty in them.
iii. Conscientious with the thumb.
The pollex can be quite a challenge, then exist sure to get its direction properly.
Also remember that the base of the thumb, which is the part that's connecting it to the mitt, is also quite fat.
4. Knuckles!
It's important to hint the presence of the knuckles. This is especially true when talking about the knuckles at the very base of each finger.
A skillful fashion to signal the knuckles is using shading. I notice this works ameliorate than merely drawing them boldly.
And in that location you have information technology! A relaxed open hand.
I hope this drawing lesson helped you.
If you haven't already, get a souvenir from me past subscribing here. You'll become my crawly tips and advice. You won't regret it (;
And I'll talk to you soon.
– Liron

Source: https://lironyan.com/how-to-draw-an-open-hand-palm/
Posted by: mcgaugheytrachattee.blogspot.com
0 Response to "How To Draw An Open Palm"
Post a Comment